MobaXterm and the Preferred Authentications.

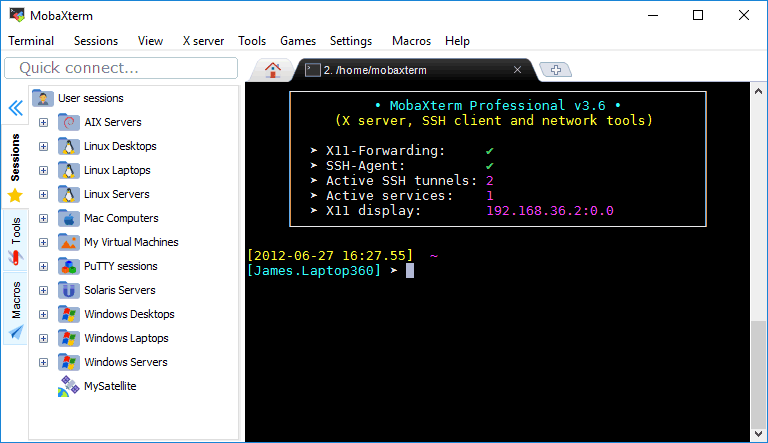
 Some months ago a co-worker suggested this application as it is very practical and saves you time if you need to setup a X server on Windows (like Xming), transfer files, etc.

Everything was working fine until the last version that came available (I think it was probably version 21.1 or the next after that). when it started to request the password three times if you try to connect using ssh to a host running with Solaris.

My first theory was that the ssh package was upgraded on all the hosts as OS upgrade was done but that was not happening with other applications like "putty.exe", so that was discarded.

Then considered that by mistake I applied a change to the MobaXterm settings but nothing was different and even applying changes the original issue was present.

After a lot of research one of the suggestions (sorry, lost the page and I hope to find it again to give the credits) worked for me, so here are the steps:


1.- Inside your "moba home" create ~/.bashrc (if that file doesn't exists)
and add this line:
/bin/cp -p /etc/my_ssh_config /etc/ssh_config

2.- Edit /etc/ssh_config and comment the following line:
#PreferredAuthentications hostbased,publickey,password,keyboard-interactive
 

Now copy and paste the same line but change the order of the "Preferred Authentications" leaving "keyboard-interactive" as your first option:

PreferredAuthentications keyboard-interactive,hostbased,publickey,password


3.- Copy your ssh config file to a new file
/bin/cp -p /etc/ssh_config /etc/my_ssh_config


4.- Try to connect again to the Solaris host, you should be fine now :) 


Amigo organillero

 Hoy por la tarde, un par de personas estaban recorriendo la zona con un organillo montador sobre un... ¿carrito?, no sabría que descripción darle.


Lo importante es que nos alegraron la tarde con diversas canciones, para salir de la monotonía causada por la pandemia y ellos pudieron recolectar algo de dinero de los vecinos que salieron.

Unsigned application requesting unrestricted access to system.

 This week I had to work with an appliance and had to launch a remote console via ilom but everytime I tried the following window was displayed:


So, I did a search for
"The following resource is signed with a weak signature algorithm MD5 with RSA and is treated as unsigned" and found three links

https://www.blackmoreops.com/2017/06/08/fix-java-error-unsigned-application-requesting-unrestricted-access-to-system/
https://learningintheopen.org/2017/11/03/java-jnlp-error-weak-signature-algorithm-md5withrsa/
and
https://www.cyberciti.biz/datacenter/bmc-ipmi-kvm-java-applets-broken-with-java-security-update/

basically one has to comment out a line containing the words "jdk.jar.disabledAlgorithms"

to the file on a similar path on my system (I'm using Win10 and the latest java version available)

C:\Program Files (x86)\Java\jre1.8.0_261\lib\security\java.security

The line I found is: jdk.jar.disabledAlgorithms=MD2, MD5, RSA keySize < 1024, DSA keySize < 1024

After I commented out the line and saved the changes (as Administrator, otherwise you can not save the changes to the file) I was able to launch the console but after a few seconds I received a second error message saying:

protocol is disabled or cipher suites are inappropiate java

Another search lead me to

https://talesfromthedatacenter.com/2015/05/ilom-error-no-appropriate-protocol-protocol-is-disabled-or-cipher-suites-are-inappropriate/

explaining that another line on the same file needs to be commented out too containing the words
"jdk.tls.disabledAlgorithms=SSLv3"

On my system again the line suggested looks like this:

jdk.tls.disabledAlgorithms=SSLv3, RC4, DES, MD5withRSA, DH keySize < 1024, \
EC keySize < 224, 3DES_EDE_CBC, anon, NULL

After I commented the lines, launched the console again and worked fine 100%.

The alternative is to download/install older versions of java, there's another page with more details about this:

https://www.java.com/en/configure_crypto.html

For me, is faster to edit/save the file, launch the console, get the work done and revert the changes to the file.


Oracle Certified! Oracle Cloud Infrastructure - Foundations Associate 2020

So, after some weeks learning about the Oracle Certification "Oracle Cloud Infrastructure - Foundations Associate"  I'm officially certified!


Let's see what else I'm going to learn later. :)

New led fans Eagle Warrior

It was time to make the PC a little more fun and decided to buy a couple of led fans, the brand is "Eagle Warrior" which is a Mexican brand of gamer products.


You can reach them via:  www.eaglewarrior.net / https://twitter.com/eaglewarriormx?lang=en  


These is the look of the brand:


And how the PC looks now:


So far so good, both working and look great!

Hardware upgrade for Laptop Gateway M-6806m

I'm doing a hardware upgrade to this  old  laptop by upgrading the RAM from 2G to 4G, removing the DVD and adding a caddy to store the original hard drive were the DVD was and a new SDD to install the OS instead of the original HDD.


The caddy I gouth is a PATA IDE to SATA, 12.7mm to connect the original HDD, which you can see over the DVD and the SSD already connected and protected by that metal "cage" to the left.

Now, you can see the original RAM installed and the new 4G protected with the envelops they were sent by the provider:


And now, these are the brand new 4G RAM installed:


 Now, this is how it looks the caddy taking the place and simulating being the DVD (at the bottom):


The old BIOS detects the new RAM installed:


But I had a problem with the BIOS to put the SSD as the primary boot device and the HDD as secondary,  somehow the HDD went to the "bottom" of the options and it was complicate to put it below the SSD.


When I finally got the drives in the boot order as I wanted, there were issues with the RAM while I was doing tests, so I had to use memtest to confirm one of them was defective, I reached the provider who confirmed the memtest results I ran and send the replacement a few days later.

Finally with the new hardware, this is how it looks running:

The laptop came with Windows XP and now it is running Linux Mint, not sure if it will remain installed, maybe I'll reinstall it with Debian, not sure yet but I'm looking to get a graphical environment that does not consume too much resourcers and don't require too much time doing settings.


A couple of links I used to research to find the correct caddy:

http://www.2ndhddcaddy.co.uk/gateway-m-6806m-2nd-hdd-hard-drive-caddy.html

https://www.manualslib.com/manual/432038/Gateway-M-6801mt.html?page=123#manual

AdGuard Home instead of pi-hole with a Raspberry Pi 2 Model B

In the last days/weeks I'm seeing people talking about "AdGuard" instead of "pi-hole" so I decided to give it a try.

These are the steps I followed to install it using the Raspberry Pi 2 Model B where I have pi-hole running at the moment.

First, stop/disable pi-hole:

pi@localhost:~ $ pihole disable
  [i] Disabling blocking
  [✓] Reloading DNS service
  [✓] Pi-hole Disabled

pi@localhost:~ $ sudo systemctl stop lighttpd
pi@localhost:~ $ sudo systemctl disable lighttpd
Synchronizing state of lighttpd.service with SysV service script with /lib/systemd/systemd-sysv-install.
Executing: /lib/systemd/systemd-sysv-install disable lighttpd

pi@localhost:~ $ sudo pihole disable
  [i] Blocking already disabled, nothing to do

pi@localhost:~ $ sudo systemctl stop pihole-FTL
pi@localhost:~ $ sudo systemctl disable pihole-FTL
pihole-FTL.service is not a native service, redirecting to systemd-sysv-install.
Executing: /lib/systemd/systemd-sysv-install disable pihole-FTL


Now proceed to download/install/configure AdGuard

pi@localhost:~ $ sudo su -
root@localhost:~# cd /usr/local
root@localhost:/usr/local# wget https://static.adguard.com/adguardhome/release/AdGuardHome_linux_armv5.tar.gz
--2020-04-06 19:34:56--  https://static.adguard.com/adguardhome/release/AdGuardHome_linux_armv5.tar.gz
Resolving static.adguard.com (static.adguard.com)... 104.20.31.130, 104.20.30.130, 2606:4700:10::6814:1e82, ...
Connecting to static.adguard.com (static.adguard.com)|104.20.31.130|:443... connected.
HTTP request sent, awaiting response... 200 OK
Length: 6202594 (5.9M) [application/octet-stream]
Saving to: ‘AdGuardHome_linux_armv5.tar.gz’

100%[===================================================================>] 6,202,594   4.62MB/s   in 1.3s  

2020-04-06 19:34:59 (4.62 MB/s) - ‘AdGuardHome_linux_armv5.tar.gz’ saved [6202594/6202594]

root@localhost:/usr/local# logout

pi@localhost:/usr/local $ ls -l
total 12052
-rw-r--r-- 1 root staff 6202594 Apr  6 19:35 AdGuardHome_linux_armv5.tar.gz
pi@localhost:/usr/local $ sudo tar xvf AdGuardHome_linux_armv5.tar.gz
AdGuardHome/
AdGuardHome/AdGuardHome
AdGuardHome/README.md
AdGuardHome/LICENSE.txt

pi@localhost:/usr/local/ $ cd AdGuardHome/
pi@localhost:/usr/local/AdGuardHome $ ls -l
total 12788
-rwxr-xr-x 1 1002 1002 13041664 Mar 13 03:41 AdGuardHome
-rw-r--r-- 1 1002 1002    35149 Mar 13 03:40 LICENSE.txt
-rw-r--r-- 1 1002 1002    12670 Mar 13 03:40 README.md


And I had to open the port 3000 via iptables and connect!

I added the following to the iptables configuration:

-A INPUT -p tcp -m tcp --dport 3000 -j ACCEPT

pi@localhost:/etc# sudo iptables-restore < /etc/iptables.firewall.rules

Next you install and set your user/password via http

pi@localhost:/usr/local/AdGuardHome $ sudo ./AdGuardHome -s install
2020/04/06 19:57:37 [info] Service control action: install
2020/04/06 19:57:38 [info] Service has been started
2020/04/06 19:57:38 [info] Almost ready!
AdGuard Home is successfully installed and will automatically start on boot.
There are a few more things that must be configured before you can use it.
Click on the link below and follow the Installation Wizard steps to finish setup.
2020/04/06 19:57:38 [info] AdGuard Home is available on the following addresses:
2020/04/06 19:57:38 [info] Go to http://127.0.0.1:3000
2020/04/06 19:57:38 [info] Go to http://192.168.1.2:3000
2020/04/06 19:57:38 [info] Action install has been done successfully on linux-systemd

Here are the other commands you might need to control the service.

    AdGuardHome -s uninstall - uninstalls the AdGuard Home service.
    AdGuardHome -s start - starts the service.
    AdGuardHome -s stop - stops the service.
    AdGuardHome -s restart - restarts the service.
    AdGuardHome -s status - shows the current service status.

pi@localhost:/usr/local/AdGuardHome $ sudo /usr/local/AdGuardHome/AdGuardHome -s status
2020/04/06 19:59:37 [info] Service control action: status
2020/04/06 19:59:37 [info] Service is running
2020/04/06 19:59:37 [info] Action status has been done successfully on linux-systemd


After this open your browser, go to your ip/hostname:3000 set your user/password, finish the configuration and after this, make sure that you are really using AdGuard, that you are not using "resolver" or something similar set by the operating system.


I tried to keep my "how-to" clean and I don't think it has errors so, if you find errors please let me know.

STAR WARS™ Special Edition Notebook and PCIe Bus error severity=Corrected


A couple of years ago, wife needed a new laptop and bought a new notebook, the "STAR WARS™ Special Edition Notebook" specifically... because "star wars".
She decided first to use the Windows  OS and later to have dual OS having Windows and GNU/Linux.  Some time later she went full with GNU/Linux distribution.

November 11th - The notebook started to fail at boot, you can imagine that after this time the hard drive could have issues and that's what we confirmed. She'll buy a new hard drive... some time in the future.


November 30, 2019 the future was that day and the 1TB hard drive was dead.


When we had the new hard drive installed and ready, we tried with OpenSuSe but after the installation was done and first boot completed, it felt "slow" and we considered it was too much for this laptop and we decided to try with Mint.

Again after the installation was done and session started after some minutes the system hang, this time I went to one of the terminals just to find a lot of lines reporting

"PCIe Bus Error: severity=Corrected....."


Restarting was not working because as the system came up, it hang. As she didn't have time to research why this was happening I re-installed again using Ubuntu this time.

And once again, after installation/session started... randomly was hanging/freezing, went to check again the terminal and the "PCIe Bus Error...." message again.

This time I opted to do search why this was happening and the answer was found here: https://askubuntu.com/questions/771899/pcie-bus-error-severity-corrected


"Try this,

Use this link ( about the adding paramter to kernel here) to understand about adding kernel boot paramter temporarily and making it permanent. Then,

Add the parameter , pci=nomsi

And reboot.

If the problem is solved then make the change permanent. If does not work then try,

pci=noaer

same way and make it permanent if this works.

(*Reason for appearance is related to the recent Intel Skylake architecture CPUs and Realtek rtl8723be wireless adaptor.

The ubuntu team knows about it. Read more here Bug_track_ubuntu_PCIe bus error ) "


Nice...  so... how do we make this permanent?


"To temporarily add a boot parameter to a kernel:
  1. Start your system and wait for the GRUB menu to show (if you don't see a GRUB menu, press and hold the left Shift key right after starting the system).
  2. Now highlight the kernel you want to use, and press the e key. You should be able to see and edit the commands associated with the highlighted kernel.
  3. Go down to the line starting with linux and add your parameter foo=bar to its end.
  4. Now press Ctrl + x to boot.


To make this change permanent:

  1. From a terminal (or after pressing Alt + F2) run:

    gksudo gedit /etc/default/grub
    

    (or use sudo nano if gksudo or gedit are not available) and enter your password.

  2. Find the line starting with GRUB_CMDLINE_LINUX_DEFAULT and append foo=bar to its end. For example:

    GRUB_CMDLINE_LINUX_DEFAULT="quiet splash foo=bar"
    

    Save the file and close the editor.

  3. Finally, start a terminal and run:

    sudo update-grub
    

    to update GRUB's configuration file (you probably need to enter your password).

On the next reboot, the kernel should be started with the boot parameter. To permanently remove it, simply remove the parameter from GRUB_CMDLINE_LINUX_DEFAULT and run sudo update-grub again.

To verify your changes, you can see exactly what parameters your kernel booted with by executing cat /proc/cmdline.

Wiki Page:


After these changes were applied, the notebook worked like a charm... I wanted to go back and try OpenSuse/Mint but she had to keep working.

Who knows.. maybe in the future  ;-)

Trying pi-hole to block ads, trackers and more.

In the last months I've been using pi-hole to block ads/trackers/etc, here's a guide based on the official document and examples found on different sites/blogs.

I'm using a Raspberry Pi 2 Model B along with raspbian 

- Download/install/configure pi-hole

# curl -sSL https://install.pi-hole.net | bash

The installation script runs and you'll be shown the following: "This installer will transform your device into a network-wide ad blocker! "

The next step requires you to provide the DNS upstream servers, consider using the Cloudfare DNS servers 1.1.1.1 and 1.0.0.1  or the DNS server you want.

The installation is done and you should get the message:

Installation Complete!

The next steps depends on your home network configuration, on your router find the section where you set the DNS server and use the ip address that you configured for pi-hole.

Now, open your favorite web browser and point it to the ip address assigned to the host where you are doing this configuration adding /admin at the end.

You'll be at the main dashboard of pi-hole and you can see the stats/settings/logs, add more lists.

I didn't give more details about the installation of pi-hole 'cause those are well covered by the documentation provided by the team developing pi-hole, what I didn't found was a section explaining how to add a little more security using a firewall.


- Configure a firewall.

This section is about how to make iptable configurations to load on every reboot.

If you want to know about building proper rules, please do your own research.

I use iptables but you might want to use ufw or any other option available to configure your own firewall, some steps to take before going further:

    # apt-get dist-upgrade

    # apt-get update

Then I installed iptables-persistent package with apt-get command:

# apt-get install iptables-persistent

 On the menu, selected Yes for the rules.v4 file. The second choice was rule.v6 and IPv6 support, configure them based on your network configuration.

Then, edit the file rules.v4

# vi /etc/iptables/rules.v4

Now you can see the existing iptables configuration, no rules are setup yet, it is completely empty:


# Generated by iptables-save v1.6.0 on Mon Apr 29 03:27:41 2019
    *filter
    :INPUT ACCEPT [5897:7430402]
    :FORWARD ACCEPT [0:0]
    :OUTPUT ACCEPT [1767:169364]
    COMMIT
# Completed on Mon Apr 29 03:27:41 2019


You can start building your iptables using this file, adding the rules you need one per line before the COMMIT command. When you're done, save the file.

Also, I found a suggestion to add at least the following rule, in order to validate:

    -A INPUT -p icmp -m icmp –icmp-type 8 -j REJECT

Now ping your device, it should respond normally and perform a reboot:
    # reboot


When your device is back on do a ping request again and this time you should get the “Destination port unreachable” message.  Now feel free to add the rest of the rules you need.

If your line COMMIT fails maybe there are some mistakes before this line. Check each single line in your configuration file.


After I configured iptables and added more lists to pi-hole the amount of ads I saw decreased considerably but you might have to check if those lists are maintained/available or search for new.

Sometimes you might be unable to access them with no error message or something that gives you a clue why, just remember that you have a pi-hole and search the logs, disable it for a few minutes and confirm you can access the web site, after that you'll have to search which list is blocking it, contact the person who provide the list and ask to remove it or add it to the "white list" section.

I would like to see other options in the future, like configurations for specific devices, more details from the stats. So far so good, it does what is says, block the ads and it works also for an openvpn mobile client!!!


DevOps Days GDL 2020


Do you want to know what #DevOpsDays is and why you shouldn't miss it?

"DevOpsDays is a series of conferences happening around the world, and DevOpsDays Guadalajara will be the first edition in Mexico."


For more info:
https://devopsdays.org/guadalajara

Pepe Le Pew existe

Pues resulta que "Pepe Le Pew" ¡sí existe! Y no faltara el que piense "¿de qué hablas Willis?"

Vea lo siguiente:


Retrocediendo algunos años:


En algo había que distraerse mientras esperaba a que el personal de Viva Aerobus arreglara una situación inesperada causada por la huelga de sus sobrecargos.
// Cookie consent